This post may contain affiliate links. If you buy something through one of them, we may earn a small commission at no extra cost to you. Learn more.
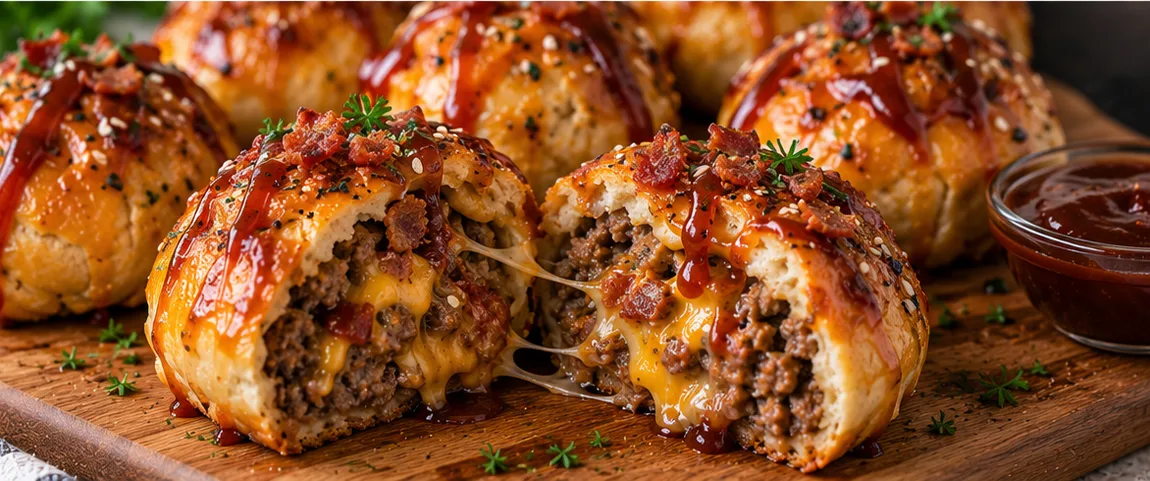
Juicy beef, smoky bacon, melted cheddar, and tangy barbecue sauce — put those together and you know something good is coming. These BBQ Bacon Cheeseburger Bombs take everything you love about a bacon cheeseburger and tuck it inside golden, buttery dough for the ultimate handheld comfort food.
They're crispy outside, juicy and cheesy inside, and loaded with bold BBQ flavor. Great for game day, parties, family dinners, or whenever you're craving something fun. And the best part? They come together more easily than you'd think.
Into easy appetizer and comfort-food recipes like this? Subscribe and get new ones sent right to your inbox!
Why These Bombs Are Worth Making
There's a lot to love about these cheesy little bites.
Juicy and Full of Flavor
Ground beef and BBQ sauce build a savory, smoky-sweet filling.
Loaded With Cheese
Melted cheddar tucked inside gives every bomb a gooey center.
Crispy and Golden
The dough bakes up beautifully golden, a great contrast to the soft filling.
Perfect Party Food
Easy to grab and eat — ideal for game days, potlucks, and parties.
A Hit With the Whole Family
A cheeseburger wrapped in golden dough? These vanish fast.
What Do They Taste Like?
Think classic bacon cheeseburger with a BBQ twist. The beef is savory and juicy, the bacon brings smoky saltiness, and the cheddar melts into a rich, gooey pocket.
BBQ sauce ties it all together with a tangy sweetness. Wrapped in warm, golden dough, every bite is hearty, cheesy, smoky, and thoroughly satisfying.
What You'll Need
For the Cheeseburger Filling
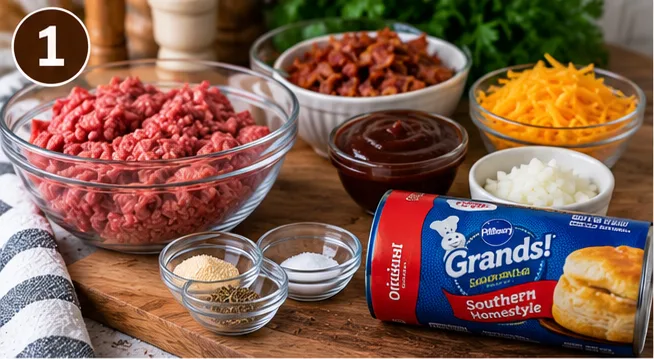
- 1 pound ground beef, preferably 80/20
- ½ cup BBQ sauce
- 6 slices bacon, cooked and crumbled
- 1 cup shredded cheddar cheese
- ½ small yellow onion, finely diced
- 1 teaspoon garlic powder
- ½ teaspoon black pepper
- ½ teaspoon salt
For the Bombs
- 1 package refrigerated biscuit dough or crescent roll dough
- 1 large egg, beaten
- 1 tablespoon melted butter
- ½ teaspoon sesame seeds, optional
Equipment You'll Need
- Large skillet
- Baking sheet
- Parchment paper
- Mixing bowl
- Wooden spoon
- Pastry brush
- Knife and cutting board
Ways to Customize These
These bombs are wonderfully flexible.
Try a Different Cheese
Cheddar's the classic pick, but you can also use:
- Pepper Jack
- Colby Jack
- Monterey Jack
- American cheese
- Smoked cheddar
Add Pickles
Finely diced dill pickles bring that classic cheeseburger tang and play nicely with the BBQ sauce.
Turn Up the Heat
Add diced jalapeños, a spicier BBQ sauce, crushed red pepper flakes, or Pepper Jack cheese.
Swap in Ground Turkey
Ground turkey works if you want something lighter — just bump up the seasoning a bit for flavor.
Add More Mix-Ins
Try finely chopped:
- Bell peppers
- Mushrooms
- Green onions
- Crispy fried onions
Just go easy on wet ingredients, since too much can make the dough tricky to seal.
How to Make BBQ Bacon Cheeseburger Bombs
A few easy steps and you've got a crowd-pleasing bite.
Step 1: Cook the Bacon
Cook the bacon in a skillet until crisp.
Drain on a paper towel-lined plate, then crumble into small pieces.
Set aside.
Step 2: Brown the Beef
Heat a large skillet over medium-high heat.
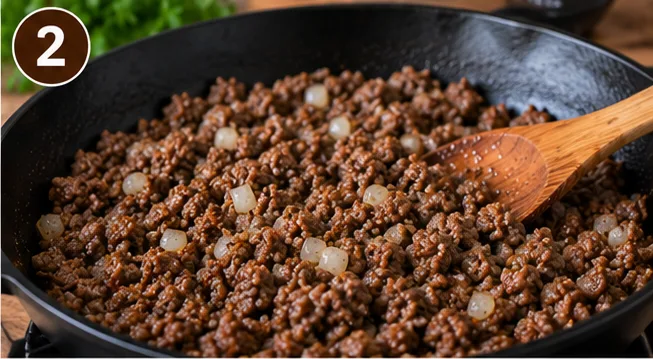
Add the diced onion and ground beef.
Cook until the beef browns and the onion softens, breaking up the beef as it cooks.
Drain off excess grease.
Step 3: Stir In the BBQ Sauce
Lower the heat.
Stir the BBQ sauce, garlic powder, black pepper, and salt into the beef.
Cook for another 2–3 minutes so the sauce coats everything.
Remove from the heat.
Step 4: Add Bacon and Cheese
Stir the crumbled bacon into the beef mixture.
Let the filling cool for a few minutes.
Stir in about half the shredded cheddar, saving the rest for stuffing.
Step 5: Get the Dough Ready
Preheat the oven to 375°F (190°C).
Line a baking sheet with parchment paper.
Separate the biscuit or crescent dough into portions.
If using biscuits, flatten each piece into a small round.
Step 6: Fill Each Piece
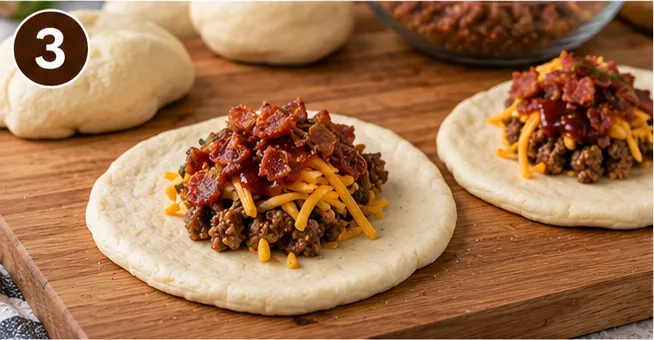
Spoon some of the beef mixture into the center of each dough piece.
Add a bit of the remaining shredded cheddar on top.
Don't overfill — too much filling makes sealing tricky.
Step 7: Seal Them Up
Fold the dough around the filling and pinch the edges firmly to seal each bomb completely.
Set them seam-side down on the baking sheet.
Step 8: Add the Finishing Touch
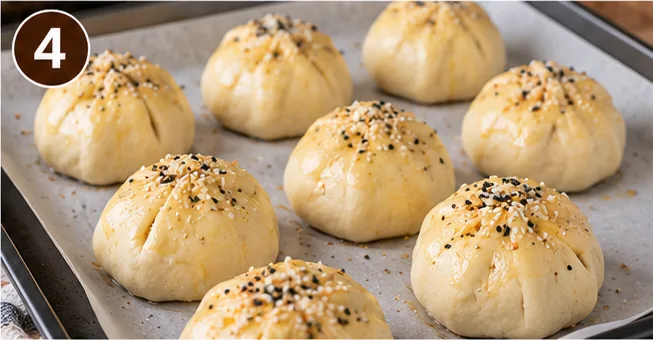
Brush each one lightly with beaten egg.
For extra richness, brush with melted butter too.
Sprinkle with sesame seeds if you like.
Step 9: Bake
Bake for about 15–20 minutes, until puffed and golden brown.
The smell coming from the oven is something else.
Step 10: Serve
Let them cool for about 5 minutes before serving.
Serve warm with extra BBQ sauce, ranch, or your favorite dip.
What to Serve Alongside Them
Great as an appetizer, but they can round out a full meal too.
Favorite Dippers
- Extra BBQ sauce
- Ranch dressing
- Honey mustard
- Ketchup
- Spicy mayo
- Cheese sauce
Favorite Sides
- French fries
- Sweet potato fries
- Onion rings
- Coleslaw
- Potato salad
- Macaroni and cheese
- Simple green salad
A bowl of extra BBQ sauce in the middle of the platter never hurts.
Tips for Getting Them Right
Keep the Filling Modest
A moderate amount makes the dough much easier to seal.
Let the Filling Cool a Bit
Hot beef can soften the dough and make it harder to work with.
Pinch the Seams Firmly
This keeps the cheese from escaping while baking.
Drain the Beef Well
Extra grease can leave the bottoms soggy.
Pick a Bold BBQ Sauce
Your sauce choice makes a real difference, so go with one you love.
Don't Overbake
Pull them once they're golden — overbaking dries out the dough.
Storing Leftovers
In the Fridge
Store cooled bombs in an airtight container for up to 4 days.
In the Freezer
Let them cool completely, wrap individually, and freeze in a freezer-safe bag or container for up to 2 months.
Reheating
For the best texture, reheat in a 350°F (175°C) oven or air fryer until warmed through.
Microwaving works in a pinch, but softens the outside.
A Little Background
These cheeseburger bombs are a fun spin on the classic — instead of serving beef, cheese, bacon, and BBQ sauce between buns, everything gets tucked into a baked dough shell.
They're especially great for entertaining since guests can grab one without needing a plate or utensils.
Frequently Asked Questions
Can I make these ahead of time?
Yes — assemble them a few hours ahead, cover, and refrigerate until you're ready to bake.
Can I use crescent roll dough?
Absolutely — crescent dough gives a light, flaky shell, while biscuit dough gives something a bit thicker and softer.
Can I use pre-cooked bacon?
Yes, and it speeds things up nicely.
Can I use a different ground meat?
Definitely — ground turkey, chicken, or pork all work.
Can I air fry these?
Yes — air fry at around 375°F (190°C) for 8–12 minutes, checking early, until golden and cooked through. Work in batches so they're not crowded.
Why did my cheese leak out?
Usually it's overfilling or an incomplete seal. Keep the portions modest and pinch the seams firmly.
Nutrition Info
Approximate values per bomb, based on 10 servings:
- Calories: 360
- Protein: 17g
- Carbohydrates: 25g
- Fat: 21g
- Saturated Fat: 8g
- Fiber: 1g
- Sugar: 7g
- Sodium: 720mg
Nutrition information is approximate and will vary depending on the dough, BBQ sauce, bacon, cheese, and other ingredients used.
Final Thoughts
These BBQ Bacon Cheeseburger Bombs pack everything you love about a bacon cheeseburger into one irresistible little package. Juicy beef, smoky bacon, gooey cheddar, and tangy BBQ sauce, all tucked inside golden, flaky dough.
Easy, fun, cheesy, and built for sharing. Serve them warm with extra BBQ sauce for dipping and watch the platter empty out.
Made these? Leave a review and share your photos on Pinterest — I'd love to see your version!
Ingredients
- 1 pound ground beef, preferably 80/20
- ½ cup BBQ sauce
- 6 slices bacon, cooked and crumbled
- 1 cup shredded cheddar cheese
- ½ small yellow onion, finely diced
- 1 teaspoon garlic powder
- ½ teaspoon black pepper
- ½ teaspoon salt
- 1 package refrigerated biscuit dough or crescent roll dough
- 1 large egg, beaten
- 1 tablespoon melted butter
- ½ teaspoon sesame seeds, optional
Instructions
- Cook the bacon in a skillet until crisp, drain on a paper towel-lined plate, then crumble into small pieces and set aside.
- Heat a large skillet over medium-high heat, add the diced onion and ground beef, and cook until the beef browns and the onion softens, breaking up the beef as it cooks. Drain off excess grease.
- Lower the heat and stir the BBQ sauce, garlic powder, black pepper, and salt into the beef, cooking for another 2–3 minutes so the sauce coats everything, then remove from heat.
- Stir the crumbled bacon into the beef mixture, let the filling cool for a few minutes, then stir in about half the shredded cheddar, saving the rest for stuffing.
- Preheat the oven to 375°F (190°C), line a baking sheet with parchment paper, and separate the biscuit or crescent dough into portions, flattening each into a small round if using biscuits.
- Spoon some of the beef mixture into the center of each dough piece and add a bit of the remaining shredded cheddar on top, without overfilling.
- Fold the dough around the filling and pinch the edges firmly to seal each bomb completely, then set them seam-side down on the baking sheet.
- Brush each one lightly with beaten egg and melted butter, and sprinkle with sesame seeds if you like.
- Bake for about 15–20 minutes, until puffed and golden brown.
- Let them cool for about 5 minutes before serving warm with extra BBQ sauce, ranch, or your favorite dip.

Hi! I'm Amanda, and my goal is to help you make quick and easy recipes for every occasion. Here you'll find inspiration, information, and delicious recipes shared with simple step-by-step instructions and photos.